F# Excel Add-In Part 2
This post follows on from the previous post, extending the Add-In with a UI.
Excel UI Extensions
There is currently two common ways to extend the Excel UI.
Ribbon Extension
This is the more mature and traditional approach. Excel ‘95 introduced a C API which allowed developers to extend Excel with with custom functionality. Excel 2007 introduced the Ribbon UI and this too can be extended by developers with custom functionality. Excel-DNA makes this kind of extension easy.
Excel Add-ins
More recent versions of Excel support a new extension mechanism known as “Add-ins”. These are a cross platform extension mechanism, working on desktop, mobile and web platforms created using web technologies such as HTML, CSS and Javacript. These can add new UI components to the ribbon (add-in commands) and also allow the creation of task panes. These types of add-ins are not covered in this post.
Update the project.
We will build on the “MyAddIn” project from the previous post. First, we need to add a reference to Office Interop.
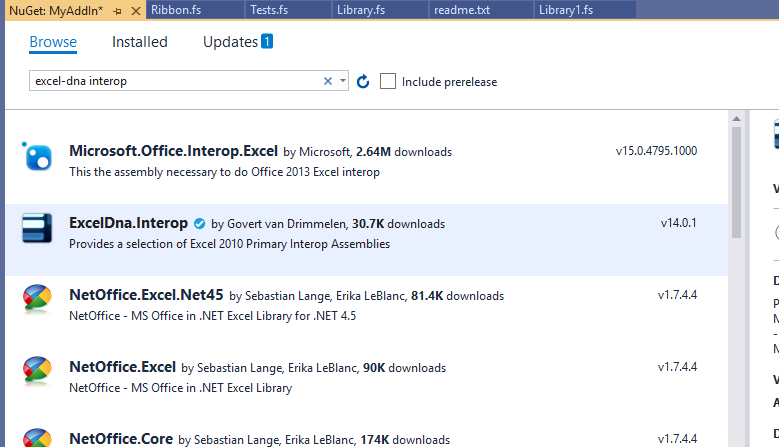
The easiest way to do this is to open the NuGet package manager as before and search for the “ExcelDna.Interop” package and install it.
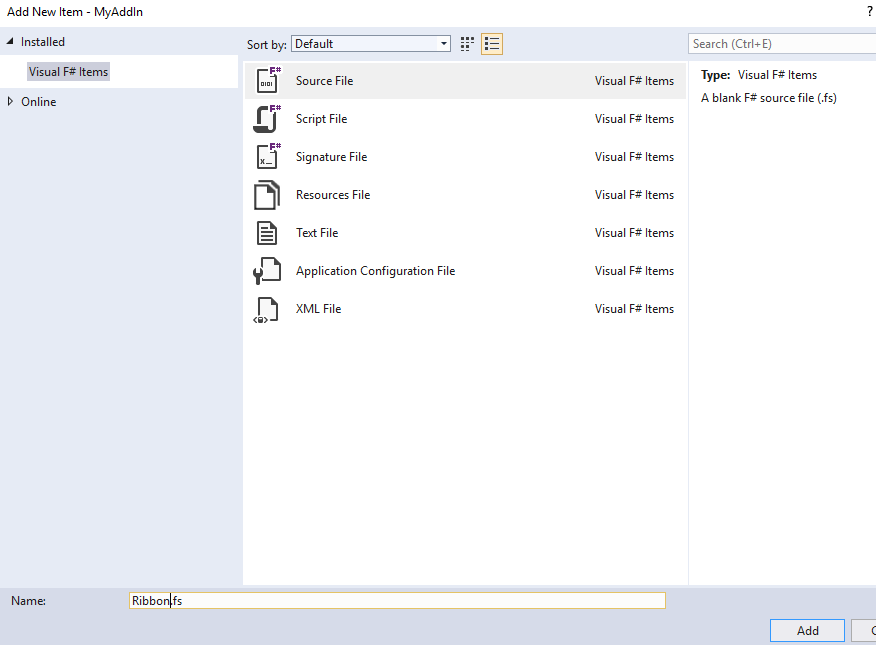
Add a new F# file called “Ribbon.fs”. We will then inherit from ExcelRibbon and extend it with our custom UI.
module Ribbon

open System.Runtime.InteropServices
open Microsoft.Office.Interop.Excel
open ExcelDna.Integration
open ExcelDna.Integration.CustomUI


[<ComVisible(true)>]
type public Ribbon() =
    inherit ExcelRibbon()

    override this.GetCustomUI(ribbonId) =
        @"<customUI xmlns='http://schemas.microsoft.com/office/2009/07/customui'>
          <ribbon>
            <tabs>
              <tab id='CustomTab' label='MyAddIn'>
                <group id='SampleGroup' label='My Addin Group'>
                  <button id='Button1' imageMso='HappyFace' size='large' label='Dump Excel Version' onAction='OnDumpData'/>
                </group >
              </tab>
            </tabs>
          </ribbon>
        </customUI>"

    member this.OnDumpData (control:IRibbonControl) =
        let app = ExcelDnaUtil.Application :?> Application
        let cellA1 = app.Range("A1")
        cellA1.Value2 <- app.Version
I have made a few changes here from the standard example. Firstly note the schema version. The “2009/07” version of the schema introduced in 2010. This newer schema allows us to do things like add custom context menus but it means our extension will not work in Excel 2007. I have also added an image to the button selecting one from the standard office palette. A list of the available images can be viewed on bert-toolkit.com. If you hit F5 you should now see your new tab with a button.
![]()
Custom button icon
If you wish to use a custom icon for your button we have a bit more work to do.
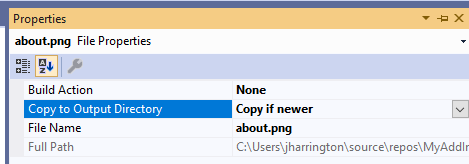
Download your image, add it to your project and change its properties so it is copied to the output directory. Next, add it to the MyAddIn-AddIn.dna file as an image resource:
<?xml version="1.0" encoding="utf-8"?>
<DnaLibrary Name="MyAddIn Add-In" RuntimeVersion="v4.0" xmlns="http://schemas.excel-dna.net/addin/2018/05/dnalibrary">
  <ExternalLibrary Path="MyAddIn.dll" ExplicitExports="false" LoadFromBytes="true" Pack="true" IncludePdb="false" />
  <Image Name="about" Path="about.png" Pack="true" />
</DnaLibrary>
Finally, update the Ribbon.fs file:
module Ribbon

open System.Runtime.InteropServices
open Microsoft.Office.Interop.Excel
open ExcelDna.Integration
open ExcelDna.Integration.CustomUI


[<ComVisible(true)>]
type public Ribbon() =
    inherit ExcelRibbon()

    override this.GetCustomUI(ribbonId) =
        @"<customUI xmlns='http://schemas.microsoft.com/office/2009/07/customui' loadImage='LoadImage'>
          <ribbon>
            <tabs>
              <tab id='CustomTab' label='MyAddIn'>
                <group id='SampleGroup' label='My Addin Group'>
                  <button id='Button1' image='about' size='large' label='Dump Excel Version' onAction='OnDumpData'/>
                </group >
              </tab>
            </tabs>
          </ribbon>
        </customUI>"

    member this.OnDumpData (control:IRibbonControl) =
        let app = ExcelDnaUtil.Application :?> Application
        let cellA1 = app.Range("A1")
        cellA1.Value2 <- app.Version
We added a ‘loadImage’ call back and added an image tag to the button element. The “LoadImage” method is provided by Excel-DNA (in ExcelRibbon) so you can override it if required. It is passed the string value from the image attribute and expected to return a Bitmap type. Finally, hitting F5 should show us the new button icon.
![]()
Custom context menu
From Excel 2010 onwards it is also possible to customize the context menu. Now that we have our base project set up, this is fairly straight forward. Modify the GetCutomUI method to match below::
    override this.GetCustomUI(ribbonId) =
        @"<customUI xmlns='http://schemas.microsoft.com/office/2009/07/customui' loadImage='LoadImage'>
          <ribbon>
            <tabs>
              <tab id='CustomTab' label='MyAddIn'>
                <group id='SampleGroup' label='My Addin Group'>
                  <button id='Button1' image='about' size='large' label='Dump Excel Version' onAction='OnDumpData'/>
                </group >
              </tab>
            </tabs>
          </ribbon>
         <contextMenus>
           <contextMenu idMso='ContextMenuCell'>
              <button id='Button2' label='Insert Excel Version'
 		        insertBeforeMso='Cut'
		        onAction='OnDumpData'
		        image='about'/>
           </contextMenu>
        </contextMenus>
        </customUI>"
And once again hit F5.
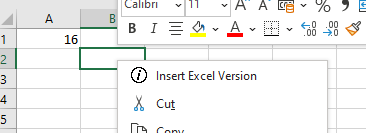
You can now see your custom menu item and icon when you right click on any cell.
Conclusion
This is a very basic demo showing how extensible the Excel UI is, and a demonstration of how you can extend the it using F#. It is worth reading the Excel-DNA sample code to learn what else you can do.